Monday, 26 January 2015

Writing (DLP Challenge #4)

This weekend's challenge for the Documented Life Project was definitely not my comfort zone. I rarely do personal writing in my journal, preferring images, single words or short quotes. But, the whole point of following the challenges is to stretch myself, and of course it's all down to personal interpretation.

Week 4 (24th Jan) challenge was:


January Theme - The Blank Page and How to Face It!
Art Challenge: Writing

Journal Prompt: Words with Friends

I knew straight away that I wanted my trio of flamingos stamp. It's wood mounted so a drew around the whole block at the beginning and then turned the page sideways, writing in blue, magenta and black in a scratchy style - heavily influenced by Rae Missigman.


I then heat embossed the flamingos in 'black sparkle' and then created the colourful background with twinkling H2Os. Using a bit more of the H2Os I added some stamping and then when fully dry, made a focal point of the writing by creating a frame using my favourite washi tape. Simple, but done!

Sunday, 25 January 2015

Colour! (DLP Challenge #3)

I pondered this challenge for a whole week before I did it....actually ending up doing something in my main journal first and then coming back to my DLP mini journal. It was exciting using the full colour wheel (without ending up with mud!).

Week 3 (17th Jan) challenge was:


January Theme - The Blank Page and How to Face It!
Art Challenge: The Colour Wheel
Journal Prompt: "I found I could say things with colour and shapes, I couldn't say any other way" - Georgia O'Keefe

Before I go any further, yes I know Georgia O'Keefe is American. But I had to use the English spelling of 'colour'. It would just bug me too much otherwise!

This week saw me reach for the gelatos, I really do like the way they blend together although it looks more blocky in the photo than IRL. I tried not to keep the edge of the circles too neat and split the colour wheel to encompass the quote.


BUT....what did I do beforehand? Well, I worked in my larger Dylusions journal on something that really was a gamble for me and could easily have turned out as a disaster. It didn't. I quite like it. I personally would like to work on my flesh tones, but like the impact of the colourful Promarkers against the monochromatic acrylics.


The double-page spread is randomly in the middle of my journal and had other scuff on it so I didn't bother rubbing out pencil lines and kept it all quite sketchy.

New beginnings (DLP Challenge #2)

Gosh, only January and already behind in keeping my blog up to date with DLP. But I AM keeping up with DLP thankfully. Really enjoying it and it's lead to doing more in my main journal, so all good!

Week 2 (10th Jan) challenge was:


January Theme - The Blank Page and How to Face It!
Art Challenge: Gesso
Journal Prompt: "The beginning is always today" - Mary Shelley

I pretty much always gesso my page as a primer but rarely use it for anything else. So this week I used it far more. I mixed it with my black and white acrylics for the background (which is really just smearing it on with my fingers) and then used it to create texture by 'scoring' it down the page with an old credit card.


Both stamps are new - picked up in The Range lately for just £1 each. Again, used gesso to add white highlights and tone down the blue on the flowers. I also used those perforated bits that get left behind in notebooks for some background texture. First time I've tried that and was pleased with the effect.

Should be a bit easier to see in this close-up.

Thursday, 1 January 2015

DLP - Challenge #1: The Blank Page and How to Face It!

As you could probably tell from my previous post, I was rather keen to get going on the first challenge of the Documented Life Project 2015.

This year each month will have a theme, with weekly art and journal prompts. Plus you get to see each artist's take on the challenge. Plenty of inspiration there then!

So, jumping right in:

January Theme - The Blank Page and How to Face It!
Art Challenge: Book Paper
Journal Prompt: Be Your Own Goal Keeper

I started off layering up some  strips of vintage and modern book pages, a guitar score, and a map section from one of the Papermania paper stacks. The colour you see on the score is from ages ago - I was cleaning Dylusions inks off my stencils if I remember rightly! My guess at colours would be Pure Sunshine and Cut Grass. 


I didn't want to cover it up too much as I intended to go with the yellow/green colour scheme so added just a thin layer of gesso and then scraped a bit more on for texture with a plastic badge-holder-thingy. I also stamped a boarder and used Distress inks Peeled Paint and Dried Marigold, plus did a bit of stencilling in the corner. 


The finished page includes washi tape, some sponging through sequin waste in Wild Honey, a stamped kite coloured with a white paint pen, and the card is my favourite Chance card from Monopoly - You have won first prize in a crossword competition, Collect £100.  I chose to take the 'goal keeper' prompt quite loosely. The first verse of Whitesnake's Here I Go Again fitted the bill for me today. 


Tuesday, 30 December 2014

Preparing for DLP 2015!

Inspired by the gorgeous makes by Miscanthus Crafts (Clare Lloyd) for the Documented Life Project 2014 I have decided to take part this year. Looks like Catherine is too - check out her cheerful cover here

It starts on 1st January but I was itching to get started and in particular, get going with the new fabulous stamps I got for Christmas from my (not-so) Secret Santa. Thanks Stamping Grandma

Working on the outer and inner covers, here's what I've done. I have chosen to use the small size Dylusions journal. Looks like the DT will be using the large size but as I already have a large one I didn't fancy another just for this work. Plus, whilst I adore my big journal, sometimes it's just too big! For me, this year the DLP is to keep me crafting - a smaller page is FAR more likely to get filled rather than me putting it off and never getting round to it.

The front:


The back: 


The inner cover:

Looking forward to Thursday now to get started...

Monday, 10 March 2014

Ombre tag technique

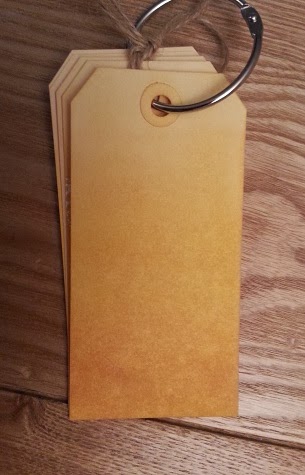
'Ombre' seems to be everywhere at the moment - cakes, hair, crafting! So for my recent meet up with craft pals (our once a year 'Craftathon') I chose the ombre technique as my make-and-take contribution. We had a hefty amount of crafting to fit into the day, so here's the tutorial for those that didn't get to finish off.....and anyone else that fancies having a go. I first learnt the technique from Craft Stamper magazine.

So this is the kind of thing you'll be producing.


You can choose any three (or more) Distress Inks of a similar colour palette. I chose yellows as they blended well with the manilla tag I used as a base.

I used:

  • Scattered Straw
  • Mustard Seed
  • Wild Honey
  • ...but you can of course use any inks as close or separate on the colour spectrum to achieve the particular effect you are after. 
STEP 1: Decide where you want the darkest portion to be (in this case the bottom of the tag) and apply the lightest colour in circular motions, fading out as you get to the opposite end from where you started. I used Scattered Straw.

I chose not to take colour right to the end, but that was because of using yellow as already mentioned. 


STEP 2: Take the next darkest colour (Mustard Seed in this case) and starting again from the same area which will be darkest on the finished tag, swipe in straight strokes about two thirds of the way along the tag. 


STEP 3: Take your final colour which is the darkest hue (Wild Honey here) and again in straight strokes from that same starting point apply ink to about one third along the tag. 

You now have a blocky, almost stripey effect. Don't worry, there's one more step. 


STEP 4: Pick up your lightest colour again (Scattered Straw for this project) and go over the whole tag in circular motions to blend it fully. 

Once you are happy with the blend you can go back in with the darker colours if you would like to. I put a little more Wild Honey on this one.


STEP 5: Lastly when it is completely dry (naturally or with a heat tool) you can stamp or heat emboss a focal design to finish the look. I used opaque white as I like the contrast it gives. 


For other ombre inspirations take a look at what comes up with an 'ombre art' search on Pinterest.

Thursday, 10 October 2013

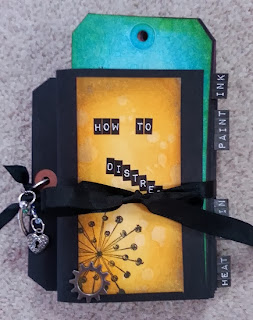
Distress Techniques Book

A couple of weeks ago I spent a lovely day at Art From The Heart with pal Catherine on the 'Distress Techniques' workshop run by the amazingly talented Kaz Hall. What a day!

I have about 7 pads of distress ink and know there's lots you can do with them as a medium but don't really do that much with them....so an ideal workshop to attend :)

We made this lovely tag book using a different technique on each one. On the reverse I've stuck the instructions Kaz gave us which outlines how to achieve each effect - good for future reference.

I do get rather over-excited at workshops as I only get to attend a couple a year. So I'm very grateful to Sandra who was sitting opposite and noticed that the example tag book was in 'threes' so said she was only changing colour combo every three tags. Genius. Mine may have been a bit all over the place if she hadn't said that.

So, onto the book. Here's the finished article. I added the charm and links when I got home, plus finished off the last set of heat embossed tags as we didn't get that far in the class.

**Disclaimer: I have no idea why some of the photos are in random orientations and I can't seem to fix it!**

THE FULL BOOK AND COVER:


THE INK TECHNIQUE TAGS:


THE DISTRESS PAINT TAGS:

PLAYING WITH THE STAINS:


AND FINALLY INKS AND HEAT EMBOSSING:


(the green one has distress embossing powders, the others use translucent lilac shimmer embossing powders)


(a close up - tag was inked, then embossed with the lilac shimmer but you could also use clear, then inked around the edge on top once dry)